Fibre Optic Glossary A–Z: Technical Terms Explained
Knowledge · Reference
Fibre Optic Glossary A–Z
This glossary explains the key technical terms of fibre optic connector, splicing and measurement technology as well as 19-inch assemblies — compact and practical, for planning and procurement. From APC through MPO/MTP and OTDR to splice modules, you will find definitions here that you can use directly in your technical documentation. The linked configurators and the loss calculator let you turn that knowledge straight into your project planning.
19-inch rack
A 19-inch rack is a standardised mounting frame with a 19-inch mounting width whose height is counted in rack units (U) and which accommodates fibre optic distribution panels, subracks and active network equipment within one consistent system.
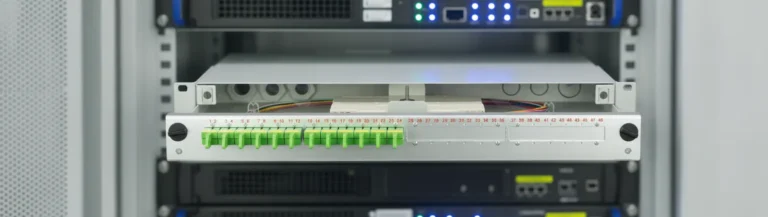
The 19-inch rack is the supporting structure of every equipment room: because the mounting width and the height grid are standardised, passive distribution equipment and active systems from different manufacturers can be combined in the same cabinet. The vertical division is counted in rack units, the horizontal division of subracks in horizontal pitch (in German Teilungseinheiten, TE), as in the case of a module 7HP wide. For the fibre optic level, always plan patching levels and guidance elements alongside the distribution panels themselves, otherwise the benefit of high port density is lost again to cable routes that can no longer be worked on. For the systems supplied by Fiber Products the following applies: the 4U subrack comes from the DIAMOND range, while the F4P system VarioConnect is available in 1U and 3U, with the 3U version accommodating splice modules and the 1U version front modules. For environments without a rack, wall distribution units or DIN rail enclosures are the appropriate alternatives. See 3U ODF system for matching components. Related: Patch cord management · Wall distribution unit (WVM) · DIN rail enclosure
APC vs. UPC
APC and UPC denote two different end face polish types of fibre optic connectors that differ in geometry and in optical properties.
UPC (Ultra Physical Contact) is polished flat and offers a low insertion loss, which is why this geometry is frequently used in multimode and in many standard singlemode applications. APC (Angled Physical Contact), by contrast, has an 8° angled polish that deflects reflected light out of the fibre core and thereby achieves a considerably higher return loss – important for reflection-critical networks such as CATV or highly sensitive transmission systems. The two polish types are neither mechanically nor optically compatible and must not be mated with one another, as this can damage the end faces and severely attenuate the link. When putting together connectors and patch cords, keeping APC and UPC components consistently separate is therefore mandatory, for example via Buy E-2000 or the subrack configurator.
Assembly and termination
Assembly, or termination, is the fitting of connectors to fibre optic cables together with their testing, so that the raw cable becomes a tested, immediately pluggable cable with defined lengths and connector types.
During assembly the cable sheath and the coating are stripped, the fibre is fixed in the connector, the ferrule end face is processed and polished, and the finished connection is tested. The decisive quality factor is the end face: geometry, core offset and cleanliness largely determine the insertion loss and return loss of the resulting connection. Compared with termination on site, factory-assembled cables offer the advantage of reproducible conditions and, as a rule, a documented measurement, but in return they call for precise length planning beforehand. When ordering, always specify connector type, polish type, fibre type and length unambiguously, because the distinction between APC (marked green) and PC in particular cannot be changed afterwards. Assembly is to be distinguished from splicing, where two fibres are permanently joined to one another instead of being given a pluggable interface. See fibre optic accessories for matching components. Related: Connector cleaning · Patch cord management · E-2000
Bend radius
The bend radius (minimum bend radius) is the smallest radius to which an optical fibre may be bent without impermissibly high additional attenuation or mechanical damage occurring.
If a fibre is bent more tightly than permitted, light escapes from the core at the point of curvature, which noticeably increases the attenuation of the link and, in the worst case, can lead to fibre breakage. The bend radius is particularly relevant when installing in narrow cable ducts, when patching in the rack and when laying fibres into splice cassettes, where the available space is often limited. Bend-insensitive fibres of class G.657 were developed specifically for such applications and permit considerably tighter radii than classic standard fibres without increasing the attenuation excessively. When designing ODF systems such as the F4P VarioConnect, the permissible bend radius is already taken into account in the cassette routing.
Blanking plate
A blanking plate is a cover plate that closes off an unused module slot in a subrack.
The blanking plate keeps the frame dust-protected and visually tidy at those positions where no adapter module or splice module has yet been fitted, and it prevents air circulation or contamination from entering the rack unimpeded through open slots. In practice, blanking plates are frequently used for expansions planned for the future: the subrack is dimensioned with sufficient HP width from the outset, while free slots are initially fitted with blanking plates until the actual need for further modules arises. In this way an ODF system can be expanded step by step without having to replace the entire frame at every expansion. In the modular design of the F4P VarioConnect, blanking plates are a standard element for unoccupied 7HP slots.
Building entry point (HÜP)
The building entry point (HÜP) is the passive location in a building at which the fibre-optic feeder cable from the public network terminates and hands over to the in-building installation.
The HÜP is usually located in the basement or the service entrance room, immediately behind the building entry, and needs no power supply. It is followed by the fibre-optic termination point (Gf-AP); from there the in-building cabling runs to the subscriber outlet (Gf-TA), at which the customer operates their active terminal device, the ONT (Optical Network Termination). So do not confuse the HÜP with the ONT: the one is a passive splice and handover point, the other an active network termination device. Allow enough excess fibre length at the HÜP so that later changes are possible without re-laying cable. In practice the HÜP frequently also marks the boundary of responsibility between the network operator and the building owner, which is why clear labelling and complete test reports are particularly important at this location. Related: Street cabinet (NVT) · FTTH and FTTx · ODN (optical distribution network)
Cable blowing (jetting)
Cable blowing is an installation method in which a fibre optic cable is introduced into an already laid duct or microduct by means of a compressed air stream and a mechanical pushing unit.
Unlike pulling with a rope, the force is not applied at a single point at the cable head; instead, the flowing air carries the cable along its entire length. This allows considerably longer sections to be completed in a single run, and the mechanical load on the cable remains lower. The prerequisites are a clean, calibrated and sealed duct, a cable outer diameter matched to the inner diameter of the duct (fill ratio) and a suitable lubricant — check the duct with a calibration gauge and a leak test before blowing. Observe the maximum pulling force and the minimum bend radii stated by the manufacturer, and prevent the cable from buckling at the duct entry when the pusher feeds faster than the cable follows. Document the lengths blown in and the duct occupancy, so that later extensions can still reliably find the free duct paths. Related: Rodent protection (CST) · Fibre optic closure · Loose tube vs. tight buffer
Chromatic dispersion
Chromatic dispersion is the broadening of optical pulses on an optical fibre that arises because different wavelength components of a signal travel through the fibre at different speeds.
It is made up of material dispersion and waveguide dispersion and is stated in picoseconds per nanometre and kilometre. On short access network links it is usually uncritical; it becomes relevant at high data rates and over great lengths, because adjacent pulses overlap and the error rate rises. In standard singlemode fibre the zero crossing of the dispersion lies close to 1310 nm, while considerably more dispersion occurs in the 1550 nm window with the lowest attenuation — this trade-off shapes the system planning of long links. Do not confuse chromatic dispersion with polarisation mode dispersion, which is based on the birefringence of the fibre, nor with modal dispersion, which occurs only in multimode fibres. It is measured with dedicated dispersion test sets, not with an OTDR. Related: G.652.D · Graded-index vs. step-index fibre · Single-mode vs multimode
Comp./RJ cable entry
The Comp./RJ cable entry denotes the design of the connector housing and the cable entry on E-2000 connectors, where the Compact version is particularly narrow along the connector axis and the RJ version uses a housing in the form familiar from RJ connectors, with a grippy bend relief boot.
The cable entry is an ordering detail that is easily overlooked, yet in service it decides packing density and ease of handling. The Compact version is narrow in build and suits densely populated front modules in 19-inch subracks, where only little lateral space is available behind the front plate. The RJ version offers a larger, grippier boot and has the advantage wherever mating occurs frequently or where users without fibre optic experience come into contact with the connection; the corresponding adapters also pick up this compact RJ form and sit horizontally side by side in the 1U patch panels of the DIAMOND line. Make sure that the cable entry you choose suits the diameter of the cable or buffer used – a boot that is too large will not clamp cleanly, one that is too small will overstretch the jacket. The term should be distinguished from bend protection in general: the cable entry describes the form in which the cable leaves the connector, while the bend relief boot is the component that safeguards the permissible bend radius immediately behind the connector. See DIAMOND E-2000 for matching components. Related: Latching mechanism · E-2000
Connector cleaning
Connector cleaning is the systematic cleaning of the ferrule end faces of connectors and adapters before every mating operation, in order to remove particles and residues that would otherwise cause added attenuation, reflections or permanent scratches.
Contaminated end faces are one of the most common causes of unexplained loss readings and sporadic transmission errors, because particles in the area of the fibre core alone are enough to render a link unusable. What makes this critical is that mating a contaminated ferrule presses the dirt into the opposing end face, where it can permanently damage both surfaces. The established rule is therefore to clean before every mating and then inspect with a fibre end-face microscope, rather than waiting for conspicuous readings before acting. Clean both sides — the connector and the adapter installed in the distribution unit — and use only purpose-made aids such as cleaning pens, cleaning cassettes and lint-free wipes. Connectors with a self-closing dust shutter such as the E-2000 markedly reduce contamination during handling, but they do not replace cleaning before mating. Related: E-2000 · Assembly and termination · Patch cord management
Crimp splice
A crimp splice is a mechanical fibre joint in which two prepared fibre ends are aligned against one another inside a sleeve and permanently held in that position by crimping the sleeve.
The crimp splice belongs to the family of mechanical splices and works without a splicing machine, mains power or an electric arc, which makes it attractive for repairs in the field, work in cramped chambers and short-term temporary installations. All you need is a stripping tool, a fibre cleaver and the matching crimp tool, so the barrier to entry is considerably lower than for fusion splicing. The price you pay is an insertion loss that is usually higher and less stable over the service life than with a fusion splice, which is why crimp splices are unusual on permanently operated backbone links. Bear in mind, too, that every crimp point remains a mechanical weak spot and must therefore be strain-relieved and laid into a splice cassette. For permanent installations with high availability requirements, a fusion splice or a plug-in connection is the more robust choice. Related: Mechanical splice · Splice cassette · Assembly and termination
dB vs. dBm
dB is a relative ratio, such as the loss of a connection, whereas dBm states an absolute power level referred to 1 milliwatt.
dB is a relative ratio, such as the loss of a connection, whereas dBm states an absolute power level referred to 1 milliwatt. Attenuation, meaning the loss along a link or at a mated connection, is therefore given consistently in dB, because it describes a ratio between two power values. A reading taken from an optical power meter, by contrast, is a dBm value, because it describes an actual, absolute optical power. The relationship between the two units follows from the arithmetic: the difference between two dBm values, for example the launch power and the received power, again yields a dB value, namely the link loss. Anyone who confuses the two quantities risks misreading test records and acceptance documentation. You can work out a realistic target value for the permissible link loss in advance with the loss calculator.
DIN rail enclosure
A DIN rail enclosure is a compact fibre-optic housing for splices and adapters that is mounted directly in control cabinets, distribution boxes or automation systems by means of a standardised mounting rail.
The DIN rail enclosure closes the gap between the fibre network and control cabinet technology: you route the incoming fibre-optic cable into the enclosure, make the transition from outdoor to indoor cable by splicing, and present the fibres at adapters in the front panel. Typical locations are industrial networks, local network stations, building management systems and charging infrastructure – in other words, wherever a 19-inch rack would be oversized or where there is simply no room for one. When making your selection, make sure there is enough space for the excess fibre length, that the cable sheath is properly strain-relieved, and that the enclosure remains accessible with the control cabinet closed. The DIN rail enclosure should be distinguished from the wall distribution unit, which is designed for higher fibre counts and usually for wall mounting outside a cabinet. See DIN rail boxes for matching components. Related: Wall distribution unit (WVM) · Splice cassette · 19-inch rack
DIN VDE 0888
DIN VDE 0888 is the German VDE series of standards for fibre optic cables in telecommunications and information processing installations, describing their construction, materials, marking and test procedures.
The series dates from a period when fibre optic cables in Germany were regulated largely at national level, and it still turns up today in tender texts, legacy documentation and material schedules. Its content covers the cable side: fibre count and bundling, sheath materials, mechanical and climatic tests, and the colour coding of fibres and loose tubes. Many parts of the series have since been superseded or replaced by the internationally harmonised cable standards of the DIN EN 60794 series, so on new designs you should always check which document actually applies in the edition cited in the tender. Do not confuse DIN VDE 0888 with the cabling standards EN 50173 and ISO/IEC 11801: those govern the planning of structured cabling, whereas DIN VDE 0888 describes the cable as a product. Connectors and other passive components are covered by standards of their own, so a standard-compliant cable alone does not yet make a standard-compliant link. Related: EN 50173 · ISO/IEC 11801 · IEC 61753
Dust shutter
A dust shutter is a spring-loaded flap in an adapter or connector that automatically covers the ferrule end face as soon as the connector is unplugged.
A dust shutter is a spring-loaded flap in an adapter or connector that automatically covers the ferrule end face as soon as the connector is unplugged. The mechanism closes without any manual intervention and protects the sensitive end face from dust, fibre fragments and other contamination that would otherwise lead to increased attenuation or damage. At the same time the shutter protects the user, since it blocks emerging laser radiation when nothing is plugged in. On the E-2000 connector the shutter is permanently integrated into the design and is therefore one of the core features of this system, whereas on other connector types it is often present only on the adapter, or missing altogether. In dusty environments such as data centres or outdoor cabinets, consistent use of the dust shutter noticeably reduces the cleaning effort. It does not, however, replace a regular end-face inspection before mating.
E-2000
The E-2000 is a connector for singlemode and multimode fibre optic cable developed by the Swiss company DIAMOND, whose spring-loaded dust shutter automatically covers the ferrule and at the same time acts as laser protection.
The E-2000 is offered in singlemode and multimode versions and therefore covers classic backbone and carrier networks as well as local fibre infrastructure. Among the common fibre optic connectors it is regarded as a particularly high-grade design, because the integrated shutter automatically protects the sensitive fibre end face against dust and mechanical damage the moment the connector is unplugged, so a separate protective cap becomes unnecessary. In the APC version with an angle-polished ferrule, the E-2000 achieves very low insertion loss combined with high return loss, which is why it is the preferred choice in data centres, carrier networks and HFC infrastructure, where stable transmission values are required over many mating cycles. The E-2000 was developed by the Swiss manufacturer DIAMOND, which has established the connector as a benchmark for high-quality fibre optic connectivity. As an official DIAMOND partner, Fiber Products supplies the complete E-2000 range; you can put together the matching connectivity for your project in the DIAMOND configurator. See DIAMOND E-2000 for matching components.
EMC of fibre optic cabling
EMC of fibre optic cabling refers to the fact that optical transmission in the fibre itself neither emits electromagnetic interference nor is affected by it, so that the question of electromagnetic compatibility shifts to metallic cable elements and to the active equipment at each end of the link.
That is precisely where the classic advantage over copper lies: in environments with frequency converters, switchgear, traction current or lightning protection issues, an all-dielectric fibre link transmits free of interference and at the same time creates no galvanic connection between two buildings or plant sections. The prerequisite is that the cable really is of all-dielectric construction. As soon as metallic elements are present, such as a corrugated sheath for rodent protection or metallic strength and support members, that metal content must be treated in accordance with the applicable rules for earthing and equipotential bonding, otherwise you give away the advantage and create a new fault path. The active components are unaffected by all this: media converters, transceivers and power supplies remain subject to EMC legislation and can introduce interference. Where cabling passes between buildings or runs in industrial environments, check the intended cable construction early on, because the entire earthing effort follows from it. Related: DIN VDE 0888 · EN 50173
EN 50173
EN 50173 is the European series of standards for application-neutral communication cabling systems, laying down the design, structure and performance requirements of copper and fibre optic cabling in buildings and on premises.
Application-neutral means that the cabling is not planned around a single service but is designed for a range of future applications. The series is divided into a general part and parts for different environments, among them office buildings, industrial premises, homes and data centres; in Germany it has been adopted as DIN EN 50173. For the optical part it defines link classes derived from fibre category, length and permissible total attenuation, together with the hierarchical structure of distributors, consolidation points and outlets. In practice, the standard therefore has a say in how many mated connections and splices you can accommodate in a link before the loss budget is exhausted. EN 50173 is closely aligned in content with ISO/IEC 11801, but differs in details and in the numbering of its parts, so read carefully which family of standards a tender actually cites. Related: ISO/IEC 11801 · DIN VDE 0888 · IEC 61753
End-face inspection (IEC 61300-3-35)
End-face inspection to IEC 61300-3-35 is a standardised visual inspection of the connector end face for scratches and particles, based on defined zones and acceptance criteria.
End-face inspection to IEC 61300-3-35 is a standardised visual inspection of the connector end face for scratches and particles, based on defined zones and acceptance criteria. The standard divides the ferrule end face into several concentric zones around the fibre core and specifies which defect size is still tolerable in which zone. Contamination is among the most common causes of faults in fibre optic links of any kind, because even microscopically small particles can cause noticeable loss or back reflections. The inspection itself is carried out with a fibre inspection microscope, which shows the end face magnified and, on modern digital instruments, assesses it automatically against the criteria of the standard. In practice the principle “clean, inspect, then connect” has become established, so that contamination is not transferred to the mating side. A documented end-face inspection is therefore one of the standard steps in any careful commissioning; see also the fibre optic glossary as a whole.
FC
FC (Ferrule Connector) is a fibre-optic connector with a 2.5 mm ferrule and a threaded screw-lock, which produces a particularly vibration-proof connection.
FC (Ferrule Connector) is a fibre-optic connector with a 2.5 mm ferrule and a threaded screw-lock, which produces a particularly vibration-proof connection. Unlike push-pull or bayonet systems, the connector is screwed on and thereby locked firmly in place mechanically, so it cannot work loose under vibration. That is why FC is found above all in test and measurement work and in industrial applications with elevated mechanical stress, for example on test sets and reference sources. When connecting to an optical power meter or a light source, the threaded lock also gives a repeatable, precise mating position, which matters for consistent readings – a target value for the link can be estimated in advance with the loss calculator. Compared with push-pull connectors such as SC, screwing the connector on and off takes more time, but in harsh environments FC offers greater mechanical security. In modern data centres it plays hardly any role, because of its lower port density.
Ferrule
A ferrule is a precision sleeve of ceramic or zirconia inside a connector that holds the fibre precisely centred and whose end face forms the contact point with the mating side.
A ferrule is a precision sleeve of ceramic or zirconia inside a connector that holds the fibre precisely centred and whose end face forms the contact point with the mating side. How accurately the fibre sits in the ferrule largely determines the insertion loss and return loss a mated connection can achieve. Different diameters are used depending on the connector type: 2.5 mm for SC, ST and FC as well as for the E-2000, and 1.25 mm for LC. After polishing, the ferrule end face is ground to a defined geometry in order to minimise back reflections. Because the ferrule is in direct contact with the mating side, scratches or contamination have an immediate effect on optical transmission. It is therefore the most sensitive part of any connector, mechanically as well as optically, and should be handled accordingly.
Fibre colour code (DIN VDE and TIA-598)
The fibre colour code is the standardised colour sequence by which the individual fibres and loose tubes of a fibre optic cable can be identified unambiguously, with the sequence to DIN VDE 0888 traditionally used in German-speaking countries and the sequence to TIA-598 used internationally.
Both systems work with twelve positions, but they start differently: DIN VDE 0888 begins with red, green, blue, yellow, white and grey, TIA-598 with blue, orange, green, brown, slate and white. Both codes are in circulation today, even within one and the same project. If you confuse the two systems, incorrectly assigned fibre pairs are the result, and they only come to light during measurement or in service — so always document in the test report which code you have worked to. Besides the buffer colour, the jacket and connector colours are also assigned by convention: singlemode cables are usually yellow, OM3 aqua, OM4 aqua or erika and OM5 lime; green connectors indicate an APC end face geometry, that is an angle-polished end face, which must not be mated with PC or UPC versions. Treat colours as an indication, not as proof: with mixed stock or with field-terminated ends, the documentation applies, not the impression. Related: Loose tube vs. tight buffer · Stripping and jacket removal
Fibre inspection microscope
A fibre inspection microscope is an optical or digital microscope for inspecting the connector end face of an optical fibre, usually with interchangeable adapters for different connector types.
A fibre inspection microscope is an optical or digital microscope for inspecting the connector end face of an optical fibre, usually with interchangeable adapters for different connector types. It reveals scratches, particles and other contamination on the ferrule that the naked eye cannot detect but that can seriously impair optical transmission. Modern digital instruments go beyond pure visual inspection: they assess the end face automatically against the zones and criteria of end-face inspection to IEC 61300-3-35 and return a clear pass-or-fail result. For technicians in the field this has given rise to the principle “clean, inspect, then connect”, so that contamination is not carried over to the mating side. A fibre inspection microscope is therefore part of the basic equipment for every commissioning and fault-finding task in fibre optic networks, whatever connector type is used. Further related terms can be found in the fibre optic glossary.
Fibre optic closure
A fibre optic closure is a re-openable housing, sealed against moisture and dust, in which fibre optic cables are joined, branched or extended outside buildings and in which the splices are stored protected in cassettes.
Closures are used wherever a route is longer than the available cable length or where a branch is taken from a main line. Common designs are in-line closures with cable entry on both sides and dome closures with entry on one side for manhole and pole mounting; depending on the design, sealing is achieved mechanically by means of sealing elements or by heat-shrink technique. After closing, many users check the seal with a pressure test kit before the closure is finally placed in position. Inside, consistently observe the permissible bend radii of the fibres and provide sufficient fibre slack in the cassettes, so that later rework remains possible without stripping the cable again. Inside a building this task is handled not by a closure housing but by a subrack in the 19-inch rack: there, splice modules take up the splices and the fibre slack, while front modules bring the fibres out to pluggable ports. Related: Cable blowing (jetting) · Stripping and jacket removal · Rodent protection (CST)
Front module
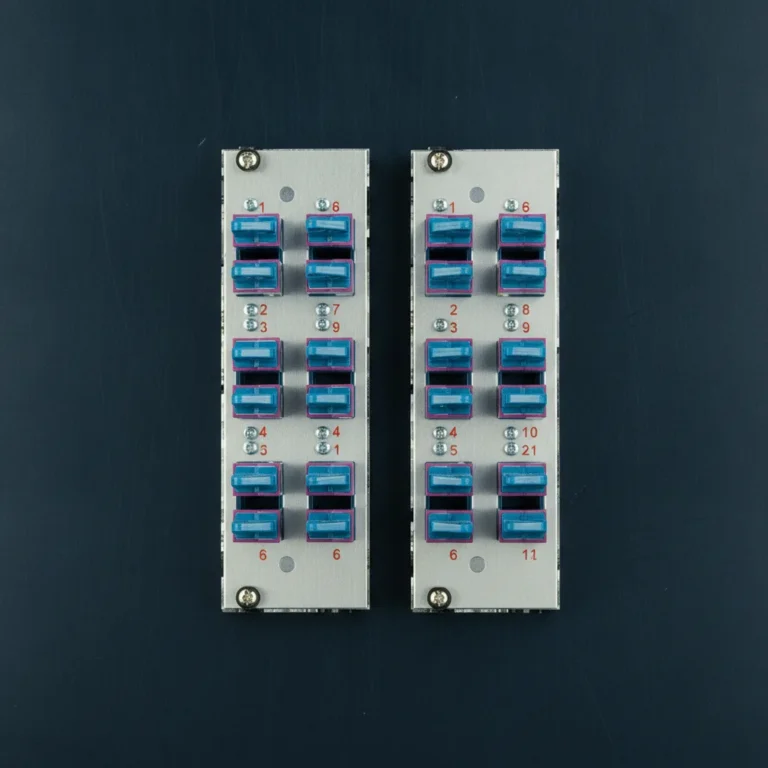
A front module (FM) is a 7HP plug-in module for the subrack that routes pre-terminated pigtails on a flat carrier plate instead of housing a large splice cassette.
Because a front module does not have to accommodate a large splice cassette, it manages with a shallower chassis than a splice module and therefore needs less mounting depth in the subrack. The pre-terminated pigtails are attached to the connectors at the factory, so on site the work is essentially limited to securing the fibres on the carrier plate and making the connection to the incoming cable – no fusion splice of your own is needed at the point of installation. The front plate itself is identical for both module types and only the internals differ, which is why a populated front module cannot readily be told apart from a splice module from the outside. As a rule of thumb for planning: 1U subracks are typically fitted with front modules, while 3U subracks tend to take splice modules. You can combine the complete range of compact and front modules with matching subracks in the subrack configurator. See splice modules for matching components.
FTTH and FTTx
FTTH (fibre to the home) denotes a fibre-optic connection in which the fibre is taken all the way into the customer’s residential or commercial unit without any copper section, while FTTx is the umbrella term for all deployment variants, which differ in how close the fibre comes to the end customer.
The x in FTTx stands for the point at which the fibre ends and – if at all – another medium takes over. With FTTB the fibre ends inside the building, usually in the service entrance room, and the stretch into the flat is bridged over existing copper or coaxial lines; with FTTC it ends at a cabinet in the street. Only FTTH manages entirely without a copper section, which is why this level of deployment decides the bandwidth that can be planned per subscriber. For you as a planner, a higher level of deployment means above all more passive transitions: the closer the fibre moves to the subscriber, the more splices and mated connections have to be documented and measured. Do not confuse FTTH with the access technology – whether an FTTH connection is operated as a point-to-point link or as a PON is an entirely separate decision. Related: PON, GPON and XGS-PON · Building entry point (HÜP) · Street cabinet (NVT)
Fusion splicing
Splicing, or fusion splicing, is the permanent joining of two optical fibres by fusing them in the electric arc of a splicing machine.
When splicing, the prepared fibre ends are aligned precisely with one another and fused by the heat of the arc, so that a virtually continuous fibre with very low insertion loss is produced — a clear advantage over plug-in connections. After the fusion process, the delicate splice is mechanically secured with a splice protector and then stored in a splice cassette, where it is protected from tension and damage. Splices are typically used wherever incoming network fibres are permanently connected to pigtails or directly to onward cables, for example in an ODF or in closures. The splice cassettes for this purpose are an integral part of the F4P VarioConnect system.
G.652.D
G.652.D is the variant of standard single-mode fibre described in ITU-T Recommendation G.652 which, thanks to a reduced water peak in the region around 1383 nm, can be used across the entire spectrum from 1260 to 1625 nm.
G.652.D is regarded today as the reference fibre in access and distribution networks; planning assumptions, splicing specifications and test reports are all based on it. The reduced water peak also makes the E-band usable and is therefore a prerequisite for CWDM systems, which spread their channels across the full spectrum. Its zero dispersion lies close to 1310 nm and its lowest attenuation in the region around 1550 nm — which is why short links usually work in the 1310 nm window and long links in the 1550 nm window. One distinction is worth noting: G.652.D is not specified as bend-insensitive; where tight radii are to be expected in distribution units, cassettes or building connections, reach for G.657. The two types can be spliced to one another without difficulty, because the A categories of G.657 are designed for compatibility with G.652.D. Related: G.657.A1/A2 · Single-mode vs multimode · Chromatic dispersion
G.657.A1/A2
G.657.A1 and G.657.A2 are bend-insensitive single-mode fibres to ITU-T G.657 that lose considerably less light at tight bends than a standard fibre and are at the same time designed so that they can be joined to G.652.D.
These fibres were developed for the building connection and for densely packed distribution units, where cables are routed around corners, through cassettes and behind panels. A2 is specified for tighter bend radii than A1; you will find the specific radii and the associated maximum additional loss in the tables of the Recommendation. The A categories are deliberately tuned for compatibility with G.652.D, so that transitions between the two worlds remain optically unremarkable — the B categories allow even tighter radii, but deviate more strongly from the standard profile. Bear one thing in mind here: bend-insensitive does not mean kink-proof. The mechanical service life of the glass still limits the permissible radius, regardless of how little light escapes at the bend. Related: G.652.D · Mode field diameter (MFD) · Single-mode vs multimode
Graded-index vs. step-index fibre
Graded-index and step-index fibres differ in the refractive index profile of the core: in a step-index fibre the refractive index is constant across the core and drops abruptly at the cladding, whereas in a graded-index fibre it decreases continuously from the centre outwards.
In multimode fibres the profile decides the bandwidth that can be achieved. In a step-index fibre the modes travel paths of different lengths on zigzag routes, the pulse smears out and the usable length drops considerably. The graded profile curves the ray paths and lets the modes travelling further out move faster in zones of lower refractive index, so that the transit times are largely equalised — which is why the common multimode classes from OM1 to OM5 are graded-index fibres. Single-mode fibres do have a largely step-shaped index profile, but modal dispersion plays no role there, because only a single mode is guided. Today you will mainly come across classic step-index fibre in large-core speciality and plastic fibres for short, uncritical links. Related: Single-mode vs multimode · Chromatic dispersion · Mode field diameter (MFD)
IEC 61753
IEC 61753 is the international series of standards that defines performance requirements and environmental categories for passive fibre optic components such as connectors, adapters, splitters and attenuators.
Where IEC 61754 describes connector interfaces geometrically and IEC 61300 governs the individual measurement and test procedures, IEC 61753 answers the question of which values a component has to maintain under defined stresses. This covers performance grades for insertion loss and return loss as well as categories for the intended operating environment, distinguishing, for example, a climate-controlled indoor space from an unprotected outdoor location. The tests typically include temperature cycling, humidity, mechanical load and repeated mating cycles; only a component that has passed the complete package may claim a category. For you as a planner, that category is the selection criterion that actually carries weight: a component qualified only for controlled indoor conditions has no place in an unheated outdoor closure. Make sure that manufacturer specifications refer to a named category and not merely to an isolated laboratory figure. Related: EN 50173 · ISO/IEC 11801 · DIN VDE 0888
Insertion loss
Insertion loss is the signal loss caused by an element inserted into the transmission link, such as a mated connection or a splice, expressed in decibels (dB).
The lower the insertion loss figure, the smaller the loss and the more optical power is available at the end of the link. Insertion loss arises from fibre offset, air gaps, contamination of the end face or geometric deviations at the point of contact, and it is added anew at every mated connection and every splice. It is therefore one of the key values that have to be taken into account when planning a loss budget, because many small losses quickly add up over a link with several adapters and splices. To estimate the link as a whole, the loss calculator is useful, as it totals up the individual elements of a link.
ISO/IEC 11801
ISO/IEC 11801 is the international series of standards for generic cabling in customer premises, defining among other things the categories of optical fibres and the requirements for optical transmission links.
This standard is the source of the designations you come across every day: OM1 to OM5 for multimode fibres and OS1 and OS2 for single-mode cabling, which differ in permissible attenuation and in their typical field of application. It also specifies how a link is built and accepted, that is, which reference measurement methods, loss budgets and link lengths are permitted for a given class. Since the more recent edition, the series has been split into several parts for different building types, among them office buildings, data centres, residential premises and industrial environments. With multimode, pay attention to the jacket colours, since in practice they serve as a quick identifier: OM3 is aqua, OM4 aqua or erika, OM5 lime. The European counterpart is EN 50173; both series follow the same concept, but they are not identical word for word. Related: EN 50173 · ITU-T G.652 and G.657 · DIN VDE 0888
ITU-T G.652 and G.657
ITU-T G.652 and G.657 are recommendations of the International Telecommunication Union that define the optical and geometric properties of single-mode fibres, with G.652 describing the classic standard fibre and G.657 the bend-insensitive variant.
G.652 is the standard fibre of telecommunications; the sub-category G.652.D that is common today is specified across the entire usable wavelength range, because the historic rise in attenuation caused by water peak absorption no longer applies. G.657 was developed for applications in which the fibre is routed tightly, that is, for building connections, distribution cabinets, closures and splice cassettes, and its sub-categories permit tighter bend radii than G.652.D without bending losses rising to unacceptable levels. The A categories of G.657 are designed for compatibility with G.652.D and can be spliced and mated with it, whereas the even more bend-insensitive B categories may have properties that deviate more strongly. For planning this means that in the feeder network and over long routes you will normally work with G.652.D, and close to the building and in densely populated distribution units with G.657. Bend-insensitive does not, however, mean bendable at will, because the decisive figure remains the minimum bend radius stated by the fibre or cable manufacturer. Related: ISO/IEC 11801 · EN 50173
Latching mechanism
The latching mechanism is the mechanical catch of a fibre optic connector that retains the connector in the adapter until it is deliberately released, and in doing so permanently maintains the contact pressure that the spring mechanism exerts on the ferrule end faces.
The latching mechanism decides whether a connection holds its optical values for years: if the connector works even minimally out of the adapter, the end faces lose physical contact, and both insertion loss and return loss deteriorate immediately. Different principles are used depending on the connector family — E-2000, LC and SC latch on the push-pull principle via a latch lever or a latch tab on the housing, the ST uses a bayonet lock and the FC a threaded nut. On the E-2000 you release the connector via the latch lever on the housing, which remains a one-handed operation even in densely populated front modules; for areas requiring access protection there are secured versions that can only be released with a tool. Do not confuse the latching mechanism with strain relief: the latch holds the connector in the adapter, while the strain relief routes forces from the cable past the connector housing. When planning how subracks and front modules are populated, allow for the latch levers still being reachable once everything is fitted, otherwise every re-patch turns into a fiddly job. You will find matching components in the DIAMOND range. See DIAMOND E-2000 for matching components. Related: E-2000 · Comp./RJ cable entry
LC
LC (Lucent Connector) is a compact connector for fibre optic cables with a 1.25 mm ferrule and a latch, whose small form factor makes it suitable for high packing density in the rack.
LC (Lucent Connector) is a compact connector for fibre optic cables with a 1.25 mm ferrule and a latch, whose small form factor makes it suitable for high packing density in the rack. The latch provides a secure, audible click on insertion and prevents the connection from being released accidentally. Compared with older connector types using a 2.5 mm ferrule, LC accommodates considerably more ports in the same area, which is why it is regarded today as the standard in data centres and in modern DIAMOND patch panels. In practice LC is usually installed as a duplex version, in which two ferrules are firmly joined by a common clip, so that the transmit and receive fibres cannot be swapped. For simplex applications, for instance on certain test instruments, LC is also available as a single connector. When planning dense distribution fields, the small form factor is a decisive advantage over SC or ST.
Link loss
Link loss is the total optical attenuation of a fibre link from transmitter to receiver in dB, made up of the fibre attenuation over the length, the mated connections and the splices.
Link loss is the total optical attenuation of a fibre link from transmitter to receiver in dB, made up of the fibre attenuation over the length, the mated connections and the splices. Each of these elements contributes its own share: the fibre itself per kilometre, every mated connection through its insertion loss and every splice through the quality of the fusion or the adhesive bond. Added together, this gives the overall figure that is checked against the loss budget permitted for the link — if the measured link loss exceeds that budget, transmission quality can no longer be guaranteed. The value is determined either directly with a power meter and light source, or indirectly by an OTDR measurement, which additionally shows how the loss is distributed along the route. When planning new links, an expected budget figure can be estimated in advance with the loss calculator.
Loose tube vs. tight buffer
Loose tube and tight buffer denote the two fundamental construction types of fibre optic cables: in the loose tube several fibres lie loosely and mechanically decoupled inside a common protective tube, whereas in the tight buffer a firmly applied protective coating with an outer diameter of 900 µm is applied to each individual fibre.
The construction decides where a cable can sensibly be used. The loose tube decouples the fibres from tension, elongation and temperature movement of the cable and is therefore the typical choice for outdoor, direct-burial and duct installation over greater lengths; depending on the design, the tube is either filled with filling compound or executed as a dry tube with water-swellable tape. The tight buffer, by contrast, can be terminated directly because the fibre already carries a buffer that can be handled, which makes it the usual construction for indoor cables, patch and connection cables and for pigtails. In practical terms this also means different working steps: loose tubes have to be opened, cleaned of filling compound in the filled version and transferred into protective tubing, tight buffers do not. Where the two worlds meet, make sure that the loose tube changes to a manageable buffer format at the latest in the distribution unit or in the closure, so that cassettes and modules can be populated as intended. Related: Fibre colour code (DIN VDE and TIA-598) · Stripping and jacket removal · Fibre optic closure
Loss budget
The loss budget is the total signal attenuation permitted across a complete fibre optic link within which transmission still works reliably.
The loss budget is the sum of the attenuation of the fibre itself over its length plus the insertion loss of every mated connection and every splice along the link. If the calculated total attenuation stays below the limit set by the system budget, the link is operationally safe; if the value is exceeded, the number of adapters has to be reduced, the routing adjusted or a different fibre type chosen. That makes the loss budget a central planning criterion as early as the design phase of a network, particularly on long singlemode links or in networks with many distribution levels. For a rough calculation of a link made up of several elements, the loss calculator is available.
Mechanical splice
A mechanical splice is a fibre joint in which two fibre ends are butted against each other in an alignment element and permanently fixed, without the fibres being fused together.
In contrast to a fusion splice, where the fibres are melted into a continuous glass structure in an electric arc, a mechanical splice leaves a butt joint, usually filled with index gel to reduce the reflection at the interface. The advantage lies in the tooling: you need no splicer, you work faster and you can also install under cramped or unfavourable conditions. Set against this are typically higher insertion loss, poorer return loss and greater sensitivity to temperature cycling and to ageing of the gel. Use mechanical splices, therefore, mainly for fault clearance, test set-ups and temporary links, while planned distribution and backbone infrastructure is built with fusion splices or plug connections. The crimp splice is one specific design of mechanical splice. Related: Crimp splice · Splice cassette
Mode field diameter (MFD)
In a single-mode fibre, the mode field diameter describes the diameter of the region in which the optical power actually propagates, and is therefore the optically effective dimension — not the geometric core diameter.
Part of the power travels in the cladding, which is why the mode field is always somewhat larger than the core and increases as the wavelength rises. In practice the value matters above all when splicing: where two fibres with different mode field diameters meet, a coupling loss arises even with perfect mechanical alignment, and it cannot be optimised away by measurement technique. You recognise such transitions by the fact that the OTDR values differ depending on the direction of measurement, and a splice point may even appear as an apparent gain in one direction — which is why measurement is carried out bidirectionally and averaged. If you mix fibre types in a network, place and document the transitions deliberately instead of leaving them to chance on site. With multimode fibres the term plays no role; there it is the core diameter that describes the relevant geometry. Related: Single-mode vs multimode · G.652.D · G.657.A1/A2
MPO/MTP
MPO/MTP is a multi-fibre connector that bundles 12, 24 or more fibres in a single common ferrule, thereby enabling parallel optical transmission and high port density in the data centre.
MPO/MTP is a multi-fibre connector that bundles 12, 24 or more fibres in a single common ferrule, thereby enabling parallel optical transmission and high port density in the data centre. Instead of individual simplex or duplex connections, a whole group of fibres is connected in one mating operation, which considerably simplifies the cabling of 40G, 100G and 400G links. Because several fibres are brought together at the same time, the polarity and the pinning (pinned or unpinned version) of the connectors must match each other exactly, otherwise individual fibres will be wrongly connected. MTP is regarded as a trademark-protected, mechanically optimised further development of the MPO standard, but both designs are intermateable. In modern data centres with high port density and parallel transmission paths, MPO/MTP has become the standard for backbone and switch-to-switch cabling. For individual requirements regarding fibre count and polarity, a project-specific enquiry is worthwhile.
ODF (optical distribution frame)
An ODF (optical distribution frame) is a central 19-inch main distribution frame that terminates, splices and patches a large number of optical fibres in one place.
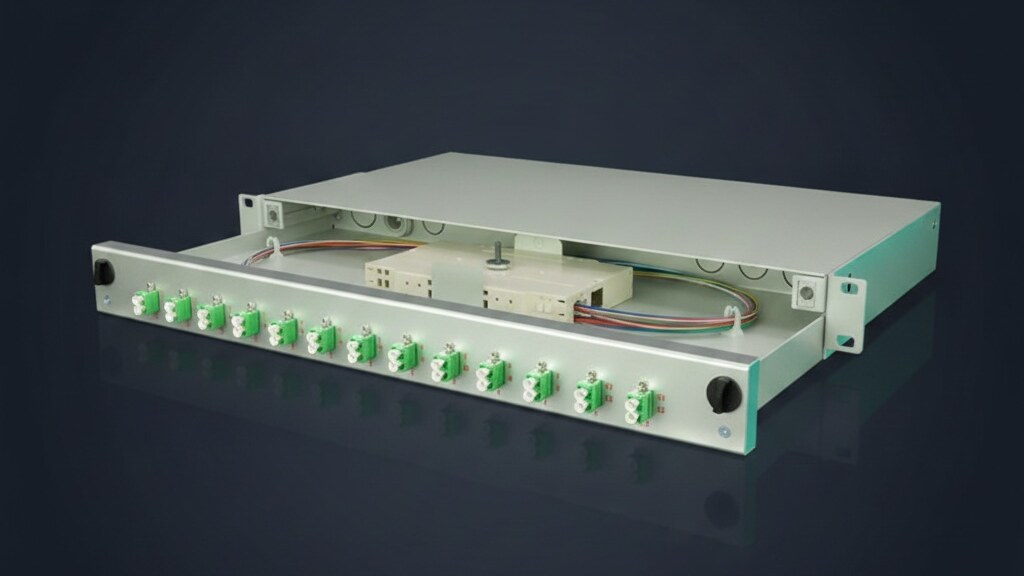
An ODF (optical distribution frame) forms the central cross-connect point of a fibre optic network and accommodates both splice cassettes for permanent fibre joints and adapter panels for pluggable patching. The ODF allows incoming and outgoing fibres to be assigned flexibly without touching the splices themselves — changes are made solely with patch cables on the front face. In practice the ODF serves as the interface between the outside plant (route, closure) and the active equipment in the rack or server room. With the F4P VarioConnect, Fiber Products offers a modular 3U ODF system that adapts to different fibre counts and connector types. When you are planning a distribution site, the enquiry page will help you choose the right configuration. See 3U ODF system for matching components.
ODN (optical distribution network)
The ODN (optical distribution network) is the entirely passive part of an optical access network between the line termination (OLT) at the network node and the network termination units (ONT) at the subscribers, and it comprises all the fibres, splices, connectors and splitters in between.
By definition the ODN contains no active equipment — anything that needs power sits either at the network node or at the subscriber’s premises. Its most important parameter is the loss budget: the sum of fibre attenuation, splitter loss, splices and connectors must stay within the loss class permitted by the PON scheme in use. Because the ODN rarely changes over its service life, the quality of the passive components largely determines whether you can later migrate to a faster transmission scheme without physically rebuilding the link. Document the ODN fibre by fibre and, once construction is complete, measure both insertion loss and return loss. Keep the terms apart: the ODN is the infrastructure, PON the transmission method operated over it. Related: PON, GPON and XGS-PON · Splitters and couplers · FTTH and FTTx
OM3/OM4/OM5
OM3, OM4 and OM5 are laser-optimised multimode fibre types for short transmission distances, of the kind used above all in data centres.
All three types have a larger core diameter than singlemode fibres such as OS2 and are optimised for use with VCSEL laser sources, which makes high data rates over short links affordable. OM4 offers greater bandwidth than OM3 and therefore longer reach at the same data rate, while OM5 is additionally designed for wideband transmission (SWDM) and carries several wavelengths simultaneously over a single fibre. The choice between the types depends on the required data rate, the link length and the active equipment installed in the data centre. Multimode components for distribution panels and patching can be put together to suit the particular network architecture using the BGT configurator.
OS2
OS2 is the common designation for standard singlemode fibres of the G.652.D type class, which are designed for long transmission distances and for telecom and carrier networks.
The small core diameter of OS2 fibre means that only a single light mode propagates, which avoids modal dispersion and, together with low attenuation, allows very long reach without signal amplification. That sets OS2 fundamentally apart from multimode fibres such as OM3 to OM5, which are designed for short distances in data centres and have a considerably larger core. In practice OS2 is found in virtually every access network, backbone link and FTTH connection, normally combined with singlemode-capable connectors in APC or UPC polish. Suitable OS2 components for distribution units and outlets can be put together using the BGT configurator.
OTDR
An OTDR (optical time domain reflectometer) is a test instrument that launches light pulses into an optical fibre and evaluates the backscattered light in order to survey the link.
From the transit time and intensity of the backscattered light, the OTDR calculates an attenuation profile of the entire link and reveals splices, connections, bends and fibre breaks within it as characteristic events. This makes it possible not only to check the overall loss of a link, but also to pinpoint the exact position of a fault — a decisive advantage when troubleshooting long or buried routes. OTDR measurements are part of the standard acceptance procedure for newly installed or freshly spliced fibre links and serve as a reference for later maintenance measurements. As a complement to the OTDR measurement, the loss calculator provides a computed estimate of the loss budget to be expected on a planned link.
Patch cable
A patch cable (patch cord) is a fibre optic cable with factory-terminated connectors at both ends, used to link ports flexibly within a rack or ODF.
Unlike a pigtail, which carries a connector at one end only and is permanently spliced to the bare fibre at the other, a patch cable stays pluggable at all times and can therefore be swapped out. It connects two adapter panels, a panel to an active device, or two active devices directly to each other, which makes it the central tool for patching during live operation. Depending on the network segment, patch cables are required in simplex or duplex form and in various connector combinations, for example E-2000/APC or LC/UPC. Suitable versions can be found in the E-2000 range; when putting together a distribution panel, the BGT configurator will help.
Patch cord management
Patch cord management covers all the components and practices used to establish, route and document plug-in fibre connections between distribution panels and active equipment, from patch cords and guide brackets through to patch panels.
Patch cord management decides whether a distribution room is still workable years later or has turned into an unmanageable tangle of cables. Its central task is fibre routing: every patch cord must be guided above the permissible bend radius along its entire path from port to destination, which calls for horizontal and vertical guiding elements as well as adequately dimensioned cable lengths. Fibres to G.657 are less sensitive to bending than classic G.652.D fibres and make patching easier in tight spaces, but they are no substitute for clean routing. Documentation matters just as much: consistent port labelling at both ends considerably shortens any later fault-finding. Patch cord management concerns the plug-in layer and must therefore be kept clearly separate from the splice layer, which inside a distribution unit is designed to be permanent and not for daily access. See fibre optic accessories for matching components. Related: 19-inch rack · Connector cleaning · Wall distribution unit (WVM)
Pigtail
A pigtail is a short fibre optic cable with a factory-terminated connector at one end and bare fibre at the other.
The open fibre end of a pigtail is spliced on site to the incoming cable fibre in a splice box or splice module, while the terminated end is plugged straight into an adapter panel. This does away with the laborious on-site termination of the connector itself — only the splice has to be made in the field, which saves time and safeguards end-face quality. Pigtails are available in the common connector types such as E-2000, LC and SC, and for both singlemode (OS2) and multimode (OM3–OM5), and are selected to match the network architecture. The E-2000 range lists the connector variants suitable for terminating pigtails and patch cables.
PON, GPON and XGS-PON
PON (passive optical network) is an access network architecture in which several subscribers share a single fibre to the network node through purely passive optical splitters, with GPON and XGS-PON being the transmission methods standardised for it by the ITU-T.
In a PON, the optical line termination (OLT) sits at the network node and the optical network termination (ONT) at the subscriber end; everything in between is passive equipment with no power supply of its own. GPON is described in the ITU-T G.984 series and works asymmetrically, with a higher data rate downstream than upstream, whereas XGS-PON (ITU-T G.9807.1) is symmetrical and nominally specified for 10 Gbit/s in both directions. Both methods use separate wavelength bands for the forward and return paths, which is why, under certain conditions, they can be overlaid on the same fibre infrastructure by means of a coexistence element. When planning, always work through the complete loss budget between OLT and ONT — splitters, splices and connectors all contribute to it. Because of the return loss requirements, PON links predominantly use APC-polished connectors, recognisable in the field by their green housing. Related: ODN (optical distribution network) · Splitters and couplers · FTTH and FTTx
Power meter & light source
The power meter and light source together form the test pair for loss measurement: a stabilised light source launches a defined optical power into the fibre, while the power meter records it at the far end of the link.
The power meter and light source together form the test pair for loss measurement: a stabilised light source launches a defined optical power into the fibre, while the power meter records it at the far end of the link. The difference between the launched and the measured power gives the link loss in dB. Unlike an OTDR measurement, which produces a backscatter trace along the route, this method captures the actual, absolute loss between transmitter and receiver and is therefore regarded as the reference for link acceptance. In practice the two methods complement one another: the power meter supplies the overall figure for the link, while the OTDR additionally locates individual fault points along the route. Before you compare the result with the permissible loss budget, a target value can be worked out with the loss calculator so that the field measurement can be interpreted correctly.
Rack unit (U) and horizontal pitch (HP)
The rack unit (U) and the horizontal pitch (HP) are the standardised units of measurement used in 19-inch technology to state the height and the width of assemblies in a rack.
One rack unit corresponds to 44.45 mm and describes how much vertical space a subrack or enclosure takes up in the rack – a 3U ODF is accordingly three rack units high. The horizontal pitch, by contrast, describes the horizontal width of individual modules within a subrack and corresponds to 5.08 mm; a module designated 7HP is therefore 7 × 5.08 mm wide. The two dimensions are independent of one another and serve to keep module and frame sizes from different manufacturers combinable in the 19-inch rack. When putting together a subrack with a matching HP layout, the subrack configurator will help you.
Reference measurement
A reference measurement is the zeroing of a measurement chain before a loss measurement, in which the test set-up is recorded without the actual device under test so that its own attenuation can be subtracted from the result.
A reference measurement is the zeroing of a measurement chain before a loss measurement, in which the test set-up is recorded without the actual device under test so that its own attenuation can be subtracted from the result. Depending on the procedure used, the reference is taken with one, two or three test cords — the so-called 1-, 2- or 3-jumper method. Choosing the method is not a mere formality, because it determines which connections are later contained in the measurement result and which are subtracted out as part of the reference. If the wrong method is chosen, or if you switch between the reference and the actual measurement, the loss value determined for the link is noticeably distorted. For reliable, comparable results you should document the jumper method used and keep to it consistently for repeat measurements. You can estimate an expected target value for the later assessment in advance with the loss calculator.
Reflection & dead zone
A reflection occurs at connections and fibre breaks when light is thrown back at the interface and briefly overloads the OTDR receiver; the resulting dead zone prevents closely spaced events from being resolved separately.
A reflection occurs at connections and fibre breaks when light is thrown back at the interface and briefly overloads the OTDR receiver; the resulting dead zone prevents closely spaced events from being resolved separately. A distinction is made between the event dead zone, within which two reflections can still be identified as separate events, and the somewhat longer attenuation dead zone, beyond which a reliable loss measurement becomes possible again. Both dead zones depend directly on the pulse width selected on the OTDR: shorter pulses reduce the dead zone and improve resolution, but deliver less range. When measuring short links with many closely spaced connections, in patch panels for instance, choosing the shortest possible pulse width is therefore decisive if individual events are not to be missed. For long links, by contrast, a compromise between range and resolution is usually chosen.
Return loss
Return loss is a measure of how much light is reflected back towards the source at a plug-in connection, expressed in decibels (dB).
Unlike insertion loss, the rule here is that the higher the value, the better, because less back-reflected light means less impairment of signal quality and of the stability of the lasers in the transmit equipment. The value depends largely on the polish of the end face: an APC polish, with its 8° angle, deflects reflected light out of the core region of the fibre and therefore achieves considerably higher return loss values than a straight-polished UPC or PC end face. In reflection-critical networks — analogue video transmission or highly sensitive test equipment, for example — high return loss is therefore an important selection criterion for connectors. For more on choosing the right polish and on connectors in general, see the overview under Buy E-2000.
Rodent protection (CST)
Rodent protection refers to the design measures that secure a fibre optic cable against bite damage — classically by means of a corrugated steel tape (CST) applied longitudinally around the cable core beneath the outer sheath.
Bite damage caused by rodents is one of the well-known mechanical causes of failure in manholes, cable ducts and on directly buried routes. The corrugated steel tape forms a continuous hard barrier and at the same time increases the crush resistance of the cable. Because CST is metallic, the cable has to be bonded into the equipotential bonding system and properly earthed at its end points — allow for this in your closure and distribution concept from the outset. Where a metal-free design is called for, whether for lightning protection or for reasons related to the route itself, dielectric versions with glass yarn or GRP armouring are an option. Do not confuse rodent protection with strain relief: aramid yarns take up tensile forces but offer no dependable protection against rodent bite damage. Related: Cable blowing (jetting) · Loose tube vs. tight buffer · Fibre optic closure
SC
SC (subscriber connector) is a square push-pull fibre optic connector with a 2.5 mm ferrule, distinguished by a robust connection that requires no tools.
SC (subscriber connector) is a square push-pull fibre optic connector with a 2.5 mm ferrule, distinguished by a robust connection that requires no tools. You push the connector straight in and pull it straight out, without having to twist or latch it, which simplifies handling in the field. Thanks to this robustness and ease of use, SC is widely deployed and is frequently found in FTTH outlets at the customer premises as well as in older existing installations — the subrack configurator shows which housings suit it. Compared with the more compact LC connector, SC takes up more space in the rack, which makes it less suitable for high-density data centre applications. In in-building cabling and at outlets it nevertheless remains relevant because of its reliability and easy testability. When extending a network, always take the existing infrastructure into account to avoid compatibility problems.
Simplex & duplex
Simplex and duplex describe whether a fibre optic cable or connector carries a single fibre or two fibres lying side by side.
A simplex connection consists of exactly one fibre with one connector and therefore forms a single optical channel — enough where transmit and receive run over separate fibres or where transmission is in one direction only. A duplex connection, by contrast, carries two fibres in parallel in a common connector or cable and thus covers bidirectional transmission, that is simultaneous transmit and receive, in a single connection. Which variant you need depends on the active equipment at the port in question, for instance on whether the transceivers expect two separate fibres or a duplex interface. Matching simplex and duplex patch cords in a range of connector types can be found under Buy E-2000.
Single-mode vs multimode
Single-mode and multimode denote the two basic types of optical fibre: a single-mode fibre guides only one light mode through its very small core, while a multimode fibre with a considerably larger core carries many modes at the same time.
The choice between the two fibre types determines reach, bandwidth and the cost of the active equipment. Single-mode fibres with a core of around 9 µm in a 125 µm cladding are used in long-haul networks, in FTTH access networks and in carrier applications, because modal dispersion is absent and very long distances are therefore possible. Multimode fibres with a 50 µm core (OM2 to OM5) or 62.5 µm (OM1) remain confined to in-building and data centre links, but have the advantage there of less expensive transmitters. Do not confuse the fibre type with the connector format: an E-2000 is available in both single-mode and multimode versions. In practice, the colour coding of patch cords helps with identification — single-mode usually yellow, OM3 aqua, OM4 aqua or erika, OM5 lime. Related: G.652.D · Graded-index vs. step-index fibre · Mode field diameter (MFD)
Splice box
A splice box is a 19-inch enclosure in which spliced fibres are transitioned to plug-in adapters and which holds the splices protected inside a cassette.
The splice box forms the interface between the incoming cable with its unterminated fibres and the plug-in patch area of a network: inside, the fibres are fusion-spliced to pigtails, the splices are safely stored in a cassette and excess fibre length is coiled in an orderly fashion. At the front you then have plug-in E-2000, LC or SC adapters available for the onward connection technology. Depending on the requirements for accessibility and installation space, a distinction is made between fixed splice boxes such as the Fusion Box, sliding versions offering easier access to the cassette such as the Future Box, and wall-mount versions for locations without a 19-inch frame. Fiber Products supplies splice boxes both under its own F4P brand and from DIAMOND, each in various rack unit heights and fibre capacities, so that a suitable format can be found for almost any distribution location. See DIAMOND splice boxes for matching components.
Splice cassette
A splice cassette is a shallow tray fitted inside closures, distribution units or subracks that mechanically protects splices and routes the associated fibre slack along defined paths so that the permissible bending radius is never violated.
The splice cassette is what brings order to every splice point: it holds the splice protection sleeves in dedicated holders and guides the fibre slack in loops, so that a splice can be remade later without pulling in additional fibre or re-entering the cable. Without defined fibre routing, tight radii develop that cause added attenuation and, in the worst case, fibre breaks. In practice you plan for a limited fibre count per cassette and label every tray consistently, so that assignments remain traceable during a fault without having to measure. The splice cassette should not be confused with the splice module: the module is the complete 19-inch assembly that accommodates one or more cassettes. In F4P’s VarioConnect system, splice modules sit in the 3U version, while the 1U version is fitted with front modules. You will find matching components in the splice and front module range. See splice modules for matching components. Related: Mechanical splice · Wall distribution unit (WVM) · 19-inch rack
Splice module
A splice module (SM) is a 7HP plug-in module for the subrack that holds a splice cassette for up to 24 crimp splices and is connected internally to the incoming fibres by fusion splicing.
Compared with the front module, the splice module has a deeper steel chassis, because the splice cassette together with its fibre storage and slack reserve needs more internal space than a flat pigtail carrier plate. Inside the cassette, the incoming fibres are fusion-spliced to pre-terminated pigtails, so that pluggable ports appear at the front while the actual splice stays protected and strain-relieved inside the module. The front plate is identical on both module types, so splice and front modules are hard to tell apart from the outside — what decides the selection is always the internals and the connection requirement on site. As a rule of thumb in practice, splice modules are typically used in the deeper 3U subrack, while shallower 1U subracks are usually fitted with front modules. You can put together matching subrack and module combinations in the subrack configurator; for specific fibre counts and cassette configurations the team is available via the enquiry page. See splice modules for matching components.
Splitters and couplers
An optical splitter is a passive component that divides the light from one input fibre across several output fibres, while coupler is the generic term for passive components that split, combine or wavelength-separate optical power.
In FTTH networks, planar (PLC) splitters with symmetrical split ratios such as 1:8, 1:16 or 1:32 predominate, because they divide evenly across the wavelength range in use. Every split costs optical power: the larger the split ratio, the higher the insertion loss — and this share usually dominates the loss budget of a PON link. Couplers in the narrower sense often work asymmetrically, for example as a tap for measurement or monitoring purposes, or wavelength-selectively as WDM couplers. What matters is where in the network you split: a central splitter at the network node makes re-patching easier, whereas distributed splitters in the street cabinet save fibres in the feeder. Splitters themselves are passive and need no power supply, but their connection sides create additional mating points that you should record in the test report and the documentation. Related: PON, GPON and XGS-PON · ODN (optical distribution network) · Street cabinet (NVT)
ST
ST (Straight Tip) is a round connector for fibre optic cables with a 2.5 mm ferrule and a bayonet lock that secures the connection with a twist action.
ST (Straight Tip) is a round connector for fibre optic cables with a 2.5 mm ferrule and a bayonet lock that secures the connection with a twist action. To mate it, the connector is inserted and locked with a short turn, which produces a mechanically stable connection that will not readily work itself loose. As one of the older standards in fibre optics, ST has by now largely been superseded by SC and LC connectors, but it is still encountered in existing installations and in industrial environments with high vibration loads. The round body and the bayonet lock do make high port densities difficult, but in return they offer very reliable mechanical retention. When maintaining older networks, technicians therefore still need to keep suitable ST adapters and test leads to hand. For new designs, moving to more modern connector types such as SC or LC is generally advisable.
Street cabinet (NVT)
An NVT (street cabinet) is a passive distribution enclosure, sited in the street or inside buildings, in which the fibres of the feeder cable are spliced, patched and — depending on the splitter concept — divided by optical splitters onto the distribution cables running to individual properties.
The street cabinet is the point at which the network structure opens out from the feeder network into the area to be served, which makes it a key location for documentation and for later expansion. Inside you will find splice cassettes for the fibre joints, patch fields with connectors and, where applicable, the splitters themselves. Make sure there is sufficient fibre slack and that the permissible bend radii are observed, because experience shows that many of the attenuation faults introduced after installation originate in the cabinet. Keep the street cabinet distinct from the building entry point: the street cabinet belongs to the distribution network in the public domain, whereas the building entry point marks the transition into an individual building. At the network node, 19-inch fibre distribution units perform a comparable role — with VarioConnect, for example, the 3U version with splice modules or the 1U version with front modules. Related: Building entry point (HÜP) · Splitters and couplers · ODN (optical distribution network)
Stripping and jacket removal
Stripping and jacket removal are the preparatory working steps in which the outer jacket, the strength and protective elements and the fibre coating are removed stage by stage until the bare glass fibre is exposed for splicing or connector termination.
In everyday usage, jacket removal means opening the outer cable sheath, while stripping covers the entire stepped structure down to the bare fibre. The usual sequence is: score the jacket with a ring or longitudinal cut, shorten the aramid yarns with suitable aramid shears, open the loose tubes, remove all filling compound from filled tubes with cleaning wipes and finally strip the 250 µm coating from the 125 µm fibre with the stripping tool. Clean the bare fibre afterwards with isopropanol and a lint-free wipe before separating it with the cleaver — residues of gel or coating are one of the most common causes of poor splice results. Choose the blades and the tool setting to suit the buffer type, because a notch in the fibre surface will lead to a break later on, even if the splice shows nothing unusual when it is first measured. Align the stripping lengths with the specification of the cassette or splice module in use, so that the fibre slack can be stored neatly and without falling below the bend radius. Related: Loose tube vs. tight buffer · Fibre optic closure · Fibre colour code (DIN VDE and TIA-598)
Subrack
A subrack (BGT in German) is an open 19-inch frame – not an enclosed box – that accommodates 7HP plug-in modules such as splice modules or front modules.
The height of a subrack is stated in rack units (U) and the width of the modules it accommodates in horizontal pitch (HP) – two units of measurement that are standard practice in 19-inch technology and that ensure compatibility between frames and modules of differing configuration. A 3U frame accommodates up to 12 splice modules, for example, which works out at up to 288 fibres; unoccupied module slots are closed off with blanking plates in order to shield the interior of the housing against dust and mechanical influences. Because the subrack has an open construction and does not form an enclosed box, the assignment of modules, adapters and fibre routes remains visible at all times and can be adapted without difficulty during expansions or retrofits, with no need to open the entire housing. You can put together matching frame and module combinations for your project in the subrack configurator; for custom configurations you can reach us via the enquiry page. See subrack configurator for matching components.
Wall distribution unit (WVM)
A wall distribution unit, also known as a wall distribution closure or WVM, is a wall-mounted fibre optic enclosure in which incoming cables are broken out, spliced and made available as a pluggable interface via adapters.
The wall distribution unit is the classic handover point in a building or an equipment room when no rack is available, or when the fibre count does not justify a full distribution panel. Inside you will typically find a cable entry with strain relief, one or more splice cassettes and a front plate with adapters, frequently in E-2000, LC or SC format. Plan the mounting position so that the door can be opened fully and enough space remains in front of the face plate for patch cords at their permissible bending radius. Where singlemode fibres with an angled polish are terminated, you can recognise this by the green colour of the connectors and adapters, which stands for APC; never mix APC and PC within the same connection. For mounting in control cabinets, the smaller DIN rail enclosure is the more suitable form; for high port densities, the 19-inch distribution panel. You will find matching components in the DIAMOND wall distribution unit range. See DIAMOND wall distribution for matching components. Related: DIN rail enclosure · Splice cassette · 19-inch rack
Configure matching components directly
Put together subracks, splice boxes and modules for your project and request a quotation — article numbers included.
Subrack configurator · DIAMOND configurator · Send an enquiry